Showing posts with label renovation. Show all posts

Tuesday, September 15, 2015

reno and demo: stage nine (final days)


We are less than two weeks from moving day. TWO WEEKS! I am trying my best not to lose my mind in this move. 

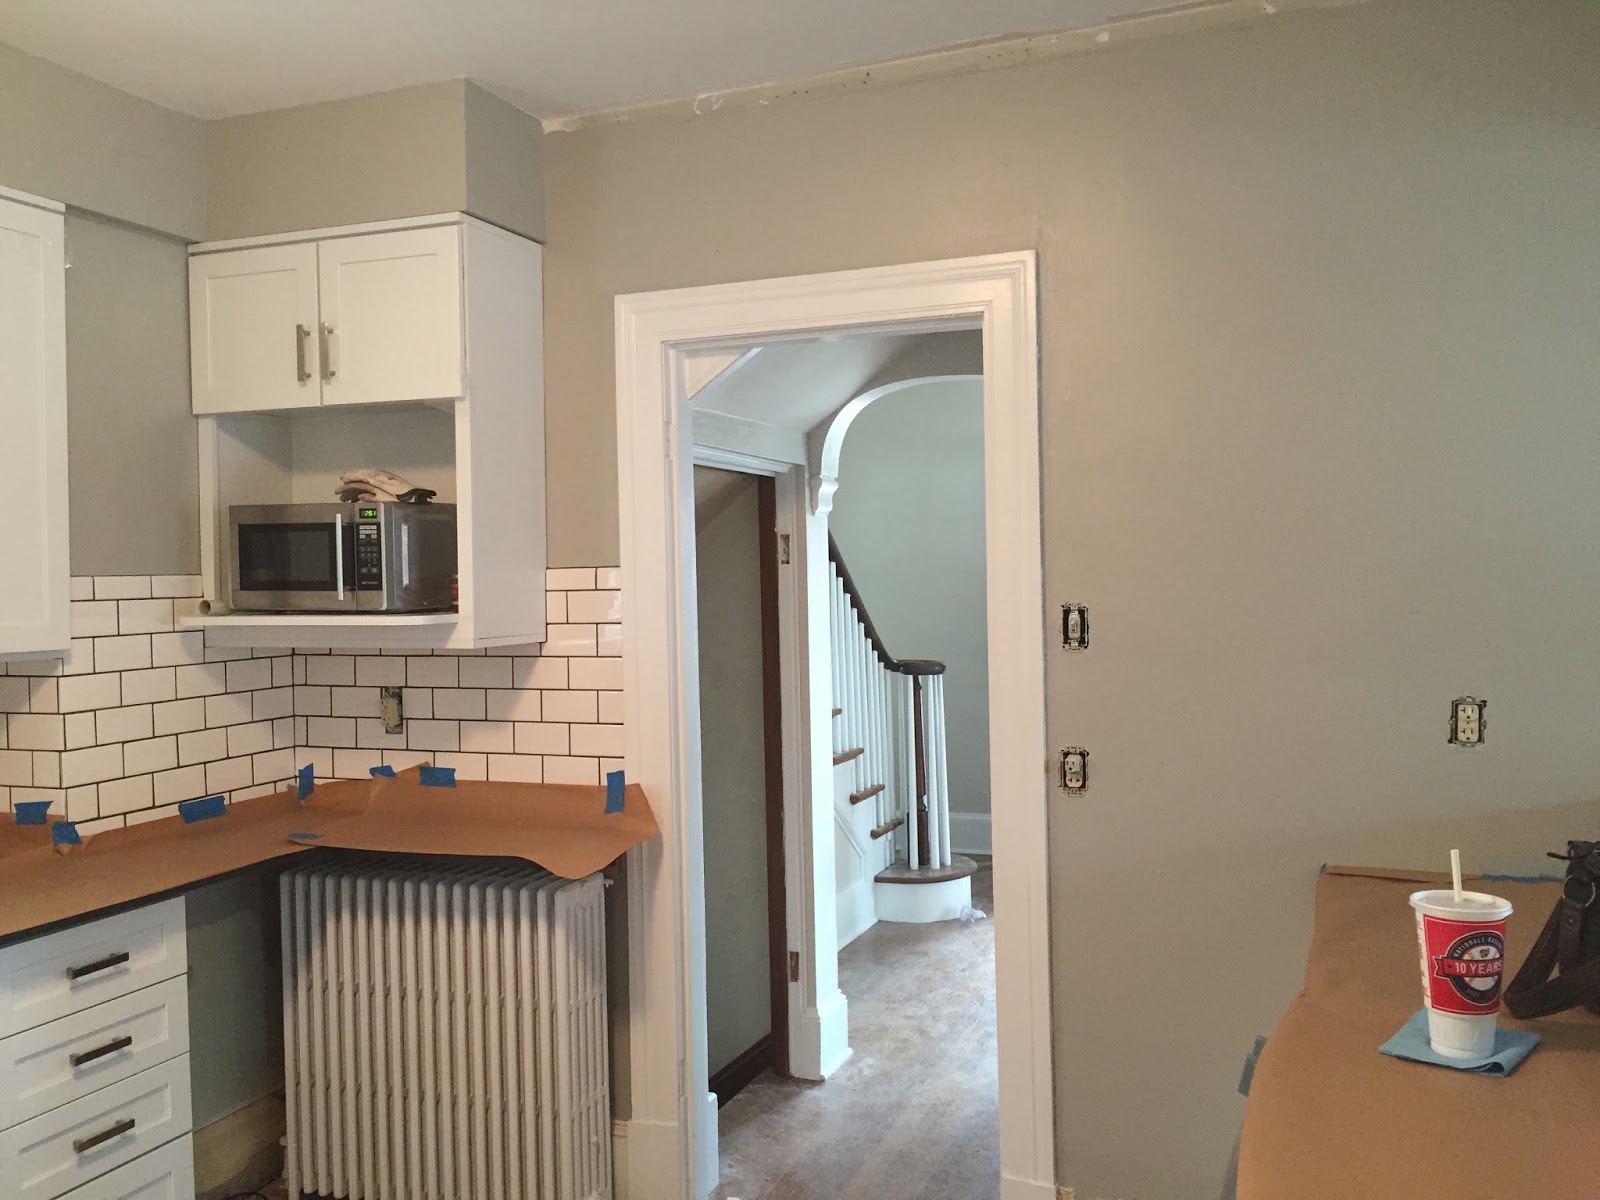
Over the weekend we got the dining room and kitchen painted and finished. 


As you can see, the counters are covered in paper because we are getting the floors done sometime this week-hopefully. The floor refinishing process makes a huge mess and produces a ton of dust, so we covered as much as we could to reduce the clean-up afterwards. 

You can also see at the top of the walls/ceilings we are missing some crown molding. Our contractor will be installing the crown molding once the floors are finished and able to be walked on. We are hoping to get the floors done on Friday because our contractor is free on Thursday to install the crown molding. 

Keeping this post short and sweet so we can do some final touches to the house while the floors are getting re-finished. 

Tuesday, September 8, 2015

reno and demo: stage 8

The kitchen got 90% completed this weekend. Our contractor came in and installed the back splash for our counter and peninsula area. We have to wait for the mortar to set before we can apply the grout. Once the grout goes on, we are able to paint the few walls that still remain bare in the kitchen and dining room. 


This is the peninsula area that "connects" the kitchen to the dining room. It can hold four bar stools comfortably-five if we need it to. We chose a stainless steel finished subway tile for this small area that needed a back splash. It's a nice contrast to the white subway tiles and white cabinets. They should also make for easier clean up and stain resistant. 


All of the appliance are also installed and working-YAY!


Most of the downstairs also got painted this weekend. The stairwell, foyer and living room are all painted and ready to go. We decided on Woodrow Wilson Putty as far as wall color goes. We describe it as a khaki grey/neutral. In the sunlight it looks more taupe and under the lights at night it has a darker grey vibe to it.


This color is a continuation from the hallway upstairs, which you can read about here.


We are in the home stretch- no pun intended- of this renovation. I am hoping to get most things done this week/weekend before the floors get refinished next weekend.


Tuesday, August 25, 2015

reno and demo: stage 7


COUNTER-TOPS ARE INSTALLED!! 

I repeat, counter-tops are installed. They were installed last week and they look amazing. I will admit that they are a tad darker than I expected them to be, but I am beyond happy with them. 


The empty space pictured above is where the dishwasher is currently housed. The counter-top wraps around the cover and sits above the radiator to give us more usable space. 


This is the opposite corner above the lazy-susan cabinet. The refrigerator will be located just to the left of the counter-top edge in this picture. 


The stove will go in this gap and you can see from the picture that there is an overhang beyond the stove. This is a 3-4 person bar top that extends into the dining room. Again, this gives us more usable counter top space and a place to eat meals-instead of the sofa/coffee table. 

Short and sweet post updating the progress in the house!


Monday, August 17, 2015

reno and demo: stage 6

I am so excited to announce that...THE UPSTAIRS OF OUR NEW HOUSE IS COMPLETELY FINISHED!! All the trim has been painted white, all the windows have been painted white, the ceilings got a fresh coat of paint, and all of the walls are painted! We are a little more than a month from moving day, which means painting downstairs will be the biggest priority for the next few weeks. I will leave you with some photos so you can see our final paint decisions upstairs. Disclaimer: the photos do not do the paint color justice. It is way prettier in person. 


I wanted something light and airy in the master bedroom since it gets quite a bit of sun from all the windows. I also had to keep it semi gender-neutral since I am sharing it with the other half-no pink walls or me. We decided to paint the walls in a color called Blanket by Valspar


I wanted a similar feeling in the guest room as the master bedroom. Something light and bright to catch all the sunlight that comes in through the window. For this room we chose the color Sea Salt Blue by Valspar, although in the picture it looks totally gray. 


For the third bedroom-which will most likely be turned into an office- we decided on something that would really contrast the white chair rail in the room. We wanted to go dark blue without making it feel really small so we settled on Mountain Lake by Valspar.


For the final color upstairs we decided on something neutral since it would be in the hallway and continue down the stairs into our living room and foyer. It's really hard to see the difference in color in this picture, but if you look closely at the lop left side of the photo you can see where the new color meets the old color. The old color wasn't that bad, we just wanted something with more gray tones instead of tan/yellow tones. For this lovely neutral color we chose Woodrow Wilson Putty by Valspar


I promise this post is not sponsored in anyway by Valspar but as you can see we quite like that brand and the paint goes on smoothly without clumping in the roller or pan. 


Stay tuned for more updates because the counter tops are getting installed TOMORROW! This will be a joyous week in our household!

Wednesday, August 5, 2015

reno and demo: stage 5

Spray paint is a miracle product! Seriously though....spray paint is giving this 1930's house a modern twist while still keeping the true character of the home. 

We have used two types of spray paint for two separate projects and they have turned out wonderfully. The first project that we tackled was all the BRASS in the house. All of the window hardware and some miscellaneous hardware were brass. The worst part was that it was all tarnished and some was starting to turn greenish brown...ICK! In order to spruce it up and bring it into the 21st century we decided to pray paint them. We used Rust-oleum Oil Rubbed Bronze and couldn't be happier. Here are the results of painting the window hardware like locks and latches. 


As you can see we took some Emory paper and sanded the surface of the latches so that the paint would having some staying power. In order to avoid the locking mechanism from getting stuck, we would move the latch after the first coat of paint. This project only took two coats of spray paint and it dried fairly quickly. 

The second spray paint project came about because we painted the trim white. Since all the trim was white, the radiators in the room looked out of place because they were still a cream/off-white color. After some Youtube research I found that the best way to paint a radiator was with spray paint, but not just any spray paint. In order to paint a radiator you need to purchase a heat-resistant spray paint. We purchased Rust-oleum High Heat Spray Paint in white to match the trim and window casings in all of the rooms.  


This project was a little more time consuming because before we painted I had to clean all of the radiators-and they had tons of dust bunnies!! I would say each radiator required about two coats of paint, and we needed four cans to paint four radiators. 

Let the wall painting begin!


Monday, July 27, 2015

reno and demo: stage 4

CABINETS ARE INSTALLED!

Cabinets arrived last week, but our contractor was out of town for the week. While everyone was out of town last week I went over to the house and painted every night. Painting upstairs is coming along slowly...but surely. We are just about finished painting all the trim white on the second floor and are picking out wall colors this week. 

I am loving this color for out master bedroom. I think it is the perfect blend of masculine and feminine, and also a perfect combination of blue and green. I am also loving this dark/navy blue in our guest bedroom separated by our white chair rail that is throughout the room. 


Anyways, back to the star of this post.... the CABINETS!! We ordered these cabinets quite a while back and I am loving them! We picked out white shaker style cabinets with a brushed nickel drawer pull to compliment the cabinets. The picture below is the start of the peninsula, which is where our oven/stove will slide in between the cabinets. 


Our contractor realized that one of our cabinets didn't come in right. We have two cabinets next to the sink that are glass front, so they need to be white on the inside as well as the outside. It turns out that one of them is still tan on the inside so we have to get the correct cabinet ordered and delivered. Hopefully the correct cabinet comes in quickly so we can get the kitchen put together completely. 


I am hoping that the next step will be for the cabinet guys to come measure for our counter tops. Luckily, the lower cabinets are all installed so the counter top measuring should still go as planned. You can see one of the glass front cabinets in the picture below-and how they are supposed to be white on the inside. We still need to get measurements for our trim that got ripped down in the dining room and kitchen and that should hopefully happen sometime next week. 


On to the next stage of renovations....

Monday, July 20, 2015

reno and demo: stage 3

WE HAVE DRYWALL UP! 

I am so excited to see drywall up in the new house. Things are starting to come together and the kitchen is taking shape. The half wall is dry walled and the dining room ceiling is up. 


The knee wall/half wall that will house the oven/stove and will also double as a breakfast bar with seating.  


The bulk head is all framed and dry walled. Cabinets will go in on Sunday. I am counting down the days for cabinets to be installed!

The basement now has dry wall installed and is starting to come together. The ceiling is quite low, so we will have to look into some flooring options that don't add too much extra height. This will be the "man cave" so decoration isn't really up to me. 


Monday, July 6, 2015

painting: stage 1

We have started to paint the upstairs of the new house, since there is still dust and construction happening downstairs. All of the bedrooms had cream colored trim and molding--which is nice--but not my style, and the hallway had this dark greenish color trim . We bought a five-gallon bucket of pure white paint for the all of the trim in the entire house. It is EVERYWHERE! The windows, baseboards, chair rails, crown molding, doorways, radiators, closet doors, and more. We have finished one room completely upstairs, completed the hallway, and are almost finished a second room. We still have two more full rooms to complete with white paint and a couple of random things to paint. 


We need to figure out the best way to paint a radiator, and I am thinking that spray paint may work the best. I think spray paint will also work best on all of the light switch covers and outlet covers-which are a mixture of black and cream-depending on the room you're in. The joys of renovation!


I also picked up some paint swatches at the hardware store this weekend to determine what color we want to paint the master bedroom. I am liking a very light green, not too limey and not too pastelish. We have some tough decisions to make in the next couple weeks. 


Tuesday, June 16, 2015

reno and demo: stage 2

While we were on vacation A LOT of work was done at the new house. Walls were taken down, cabinets were ripped out, bulkhead was installed, and the new electrical was installed. I walked into the "kitchen" when we returned on Friday and was met with a very awesome surprise:


The kitchen wall is down, and the structure for the peninsula/knee wall is in place. All the electrical wiring is reworked for a new kitchen layout and outlets. In order for the kitchen cabinets to line up properly we had to extend the bulk head around parts of the wall/ceiling. As you can see, renovations are coming along nicely. Next steps will be to pick out paint and start paining the trim and ceiling in the upstairs hallways and bedrooms. Stay tuned!


Monday, June 1, 2015

reno and demo: stage 1

Where to even begin....We spent the last weekend taking down wallpaper in an almost 100 year old house that has plaster walls. Let me tell you, wallpaper removal is not fun at all! It's sticky, it's wet and the solvent stinks. We had to remove wallpaper from the kitchen, downstairs bathroom, dining room, and upstairs bedroom. The whole process took all three days of the long Memorial Day weekend. 


In the middle of wallpaper removal our contractor decided to stop by to answer a few questions we had. While he was over he let me borrow a sledge hammer and start taking down the wall in our kitchen. That experience was AMAZING! Taking a huge sledgehammer to a plaster wall was major stress relief, but I had to clean up the mess afterwards-which was not so fun. 


Overall the process and project is coming along quite nicely. The kitchen wall is down to the studs, all the wallpaper is gone, and the basement walls are down to the studs as well. The next project will be to paint the trim and walls upstairs-since there is no work going on up there. Once the upstairs painting is finished, we will start painting downstairs.